1. Getting Started
We assume you have some experience with the Beagle and are here to learn about the PRU. This chapter discusses what Beagles are out there, how to load the latest software image on your beagle, how to run the Cloud9 IDE and how to blink an LED.
If you already have your Beagle and know your way around it, you can find the code (and the whole book) on the PRU Cookbook github site: https://github.com/MarkAYoder/PRUCookbook.
1.1. Selecting a Beagle
Problem
Which Beagle should you use?
Solution
http://beagleboard.org/boards lists the many Beagles from which to choose. Here we’ll give examples for the venerable BeagleBone Black, the robotics BeagleBone Blue, tiny PockeBeagle and the powerful AI. All the examples should also run on the other Beagles too.
Discussion
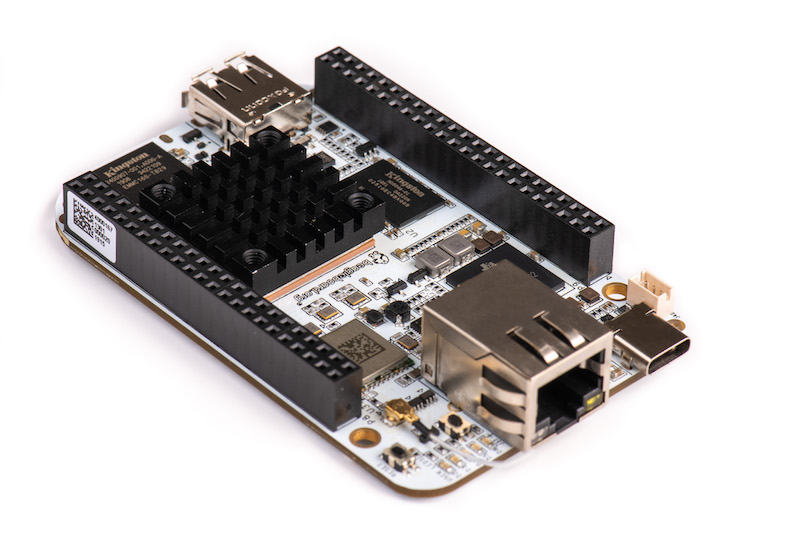
BeagleBone Black
If you aren’t sure which Beagle to use, it’s hard to go wrong with the BeagleBone Black. It’s the most popular member of the open hardware Beagle family.
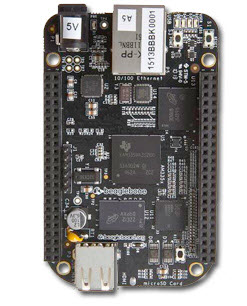
The Black has:
-
AM335x 1GHz ARM® Cortex-A8 processor
-
512MB DDR3 RAM
-
4GB 8-bit eMMC on-board flash storage
-
3D graphics accelerator
-
NEON floating-point accelerator
-
2x PRU 32-bit microcontrollers
-
USB client for power & communications
-
USB host
-
Ethernet
-
HDMI
-
2x 46 pin headers
See http://beagleboard.org/black for more details.
BeagleBone Blue
The Blue is a good choice if you are doing robotics.
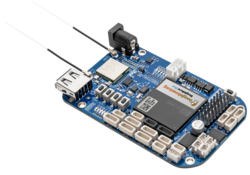
The Blue has everything the Black has except it has no Ethernet or HDMI. But it also has:
-
Wireless: 802.11bgn, Bluetooth 4.1 and BLE
-
Battery support: 2-cell LiPo with balancing, LED state-of-charge monitor
-
Charger input: 9-18V
-
Motor control: 8 6V servo out, 4 bidirectional DC motor out, 4 quadrature encoder in
-
Sensors: 9 axis IMU (accels, gyros, magnetometer), barometer, thermometer
-
User interface: 11 user programmable LEDs, 2 user programmable buttons
In addition you can mount the Blue on the EduMIP kit as shown in BeagleBone Blue EduMIP Kit to get a balancing robot.
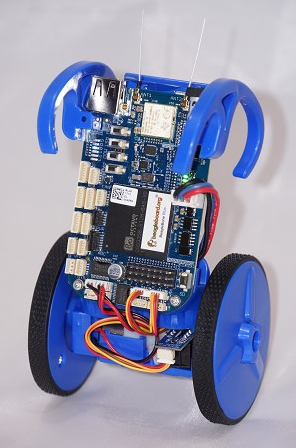
https://www.hackster.io/53815/controlling-edumip-with-ni-labview-2005f8 shows how to assemble the robot and control it from LabVIEW.
PocketBeagle
The PocketBeagle is the smallest member of the Beagle family. It is an ultra-tiny-yet-complete Beagle that is software compatible with the other Beagles.
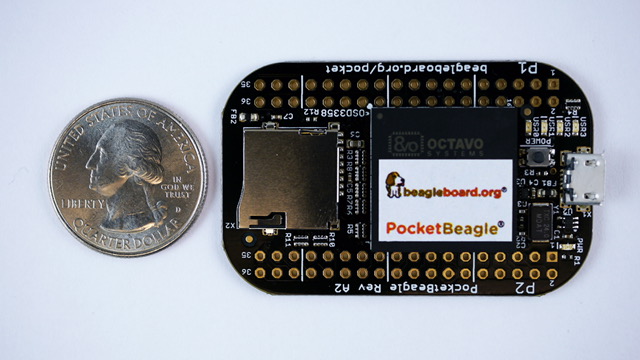
The Pocket is based on the same processor as the Black and Blue and has:
-
8 analog inputs
-
44 digital I/Os and
-
numerous digital interface peripherals
See http://beagleboard.org/pocket for more details.
BeagleBone AI
If you want to do deep learning, try the BeagleBone AI.
The AI has:
-
Dual Arm® Cortex®-A15 microprocessor subsystem
-
2 C66x floating-point VLIW DSPs
-
2.5MB of on-chip L3 RAM
-
2x dual Arm® Cortex®-M4 co-processors
-
4x Embedded Vision Engines (EVEs)
-
2x dual-core Programmable Real-Time Unit and Industrial Communication SubSystem (PRU-ICSS)
-
2D-graphics accelerator (BB2D) subsystem
-
Dual-core PowerVR® SGX544™ 3D GPU
-
IVA-HD subsystem (4K @ 15fps encode and decode support for H.264, 1080p60 for others)
-
BeagleBone Black mechanical and header compatibility
-
1GB RAM and 16GB on-board eMMC flash with high-speed interface
-
USB type-C for power and superspeed dual-role controller; and USB type-A host
-
Gigabit Ethernet, 2.4/5GHz WiFi, and Bluetooth
-
microHDMI
-
Zero-download out-of-box software experience with Debian GNU/Linux
1.2. Installing the Latest OS on Your Bone
Problem
You want to find the lastest version of Debian that is available for your Bone.
Solution
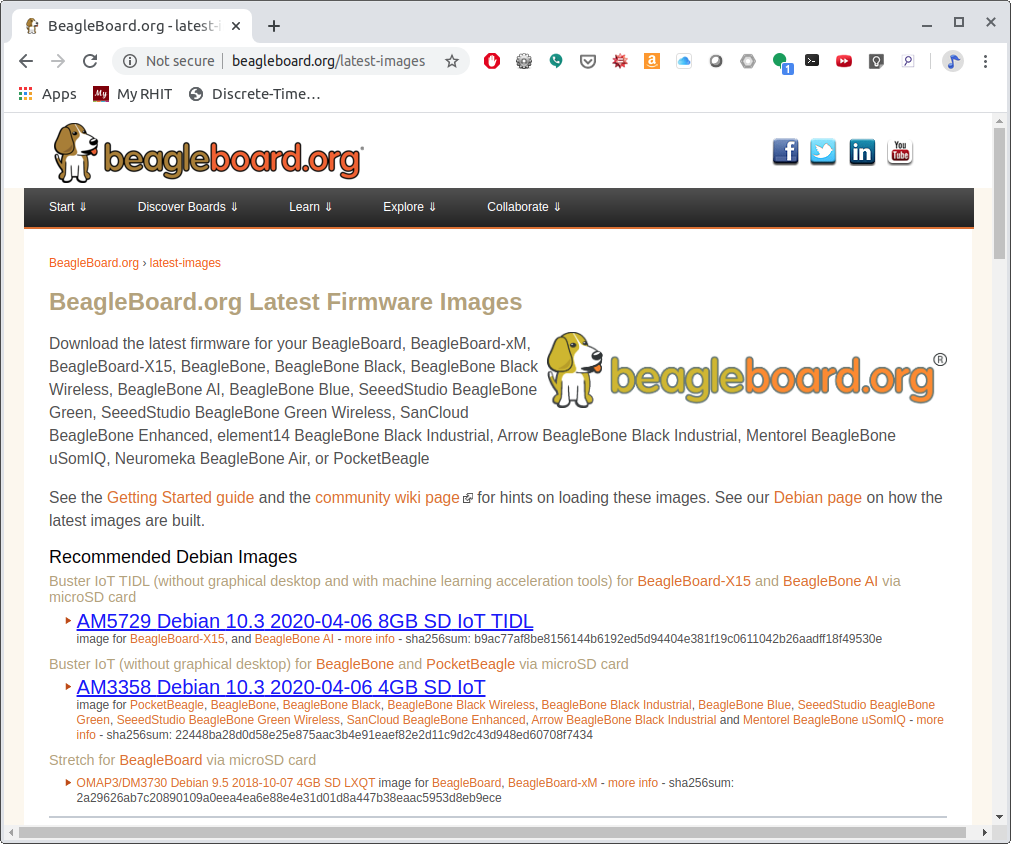
On your host computer open a browser and go to http://beagleboard.org/latest-images.
This shows you two current choices of recent Debian images, one for the BeagleBone AI (AM5729 Debian 10.3 2020-04-06 8GB SD IoT TIDL) and one for all the other Beagles ( AM3358 Debian 10.3 2020-04-06 4GB SD IoT). Download the one for your Beagle.
It contains all the packages we’ll need.
1.3. Flashing a Micro SD Card
Problem
I’ve downloaded the image and need to flash my micro SD card.
Solution
Get a micro SD card that has at least 4GB and preferibly 8GB.
There are many ways to flash the card, but the best seems to be Etcher by https://www.balena.io/. Go to https://www.balena.io/etcher/ and download the version for your host computer. Fire up Etcher, select the image you just downloaded (no need to uncompress it, Etcher does it for you), select the SD card and hit the Flash button and wait for it to finish.
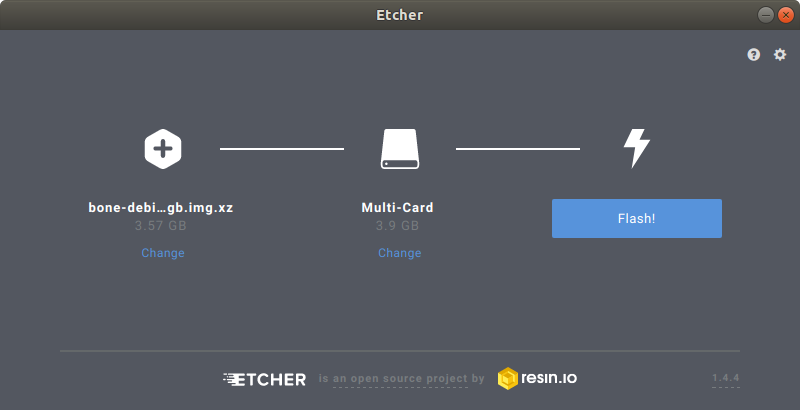
Once the SD is flashed, insert it in the Beagle and power it up.
1.4. Cloud9 IDE
Problem
How do I manage and edit my files?
Solution
The image you downloaded includes Cloud9, a web-based intergrated development environment (IDE) as shown in Cloud9 IDE.
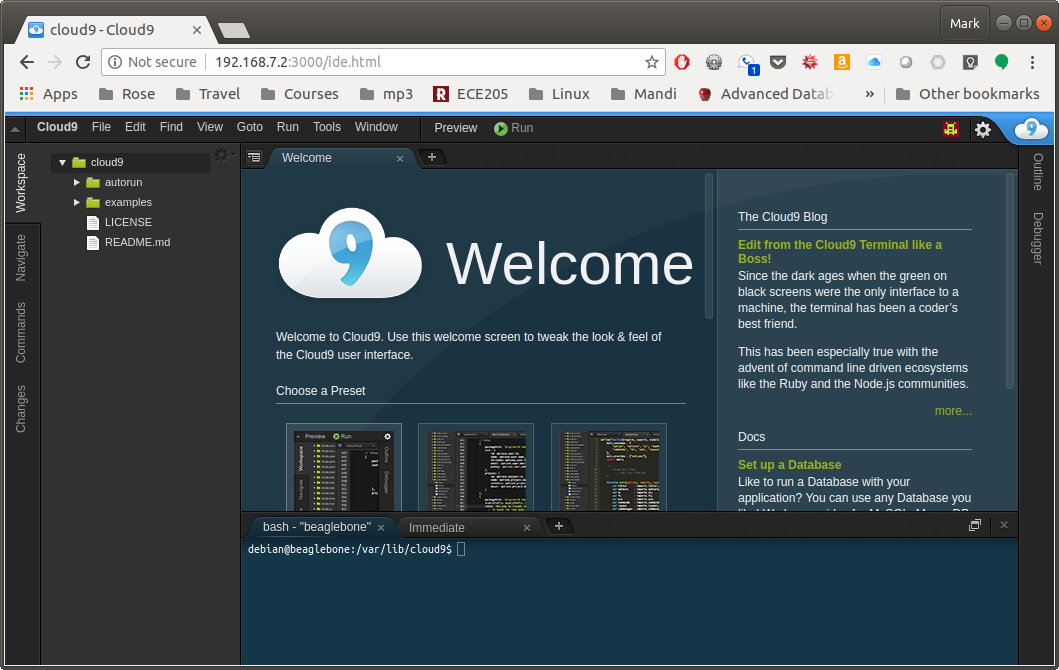
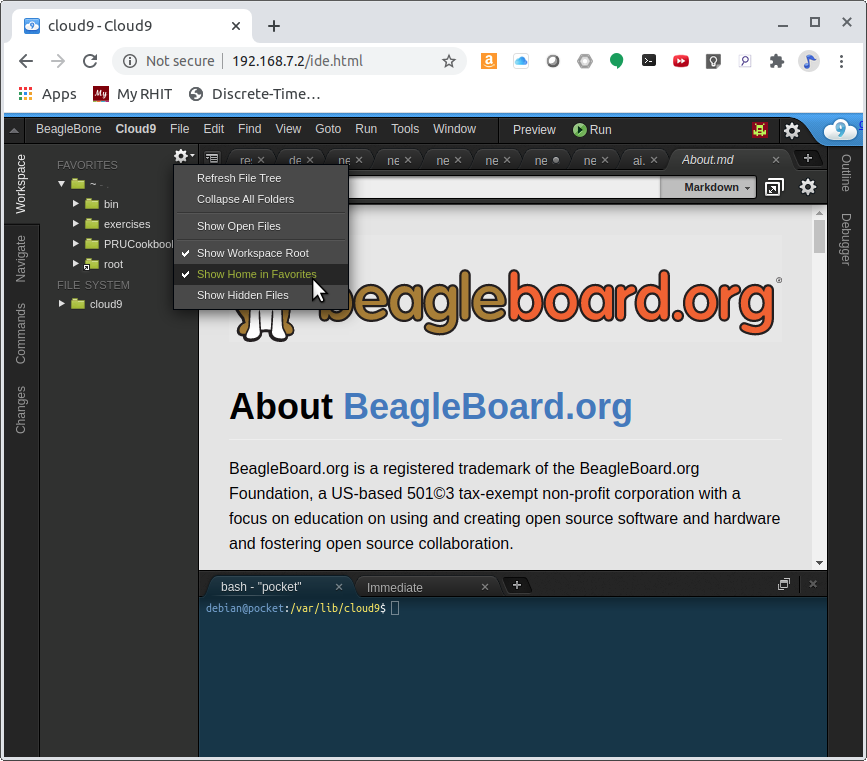
Just point the browswer on your host computer to http://192.168.7.2 and start exploring. If you want the files in your home directory to appear in the tree structure click the settings gear and select Show Home in Favorites as shown in Cloud9 Showing Home files.
If you want to edit files beyond your home directory you can link to the root file system by:
bone$ cd
bone$ ln -s / root
bone$ cd root
bone$ ls
bbb-uEnv.txt  boot  etc   ID.txt  lost+found  mnt           opt   root  sbin  sys  usr
bin           dev   home  lib     media       nfs-uEnv.txt  proc  run   srv   tmp  var
Now you can reach all the files from Cloud9.
1.5. Getting Example Code
Problem
You are ready to start playing with the examples and need to find the code.
Solution
You can find the code (and the whole book) on the PRU Cookbook github site: https://github.com/MarkAYoder/PRUCookbook/tree/master/docs. Just clone it on your Beagle and then look in the docs directory.
bone$ git clone https://github.com/MarkAYoder/PRUCookbook.git
bone$ cd PRUCookbook/docs/
bone$ ls -F
01case/     05blocks/  book.adoc  copyright.adoc  index.html  projects.adoc
02start/    06io/      book.html  hack.sh*        Makefile    projects.html
03details/  07more/    book.pdf   header.adoc     notes.adoc  style.adoc
04debug/    08ai/      common/    index.adoc      notes.html  style.html
Each chapter has its own directory and within that directory is a code directory that has all of the code.
bone$ cd 02start/code/
bone$ ls
hello.pru0.c  hello.pru1_1.c  Makefile  setup.sh
Go and explore.
1.6. Blinking an LED
Problem
You want to make sure everything is set up by blinking an LED.
Solution
The 'hello, world' of the embedded world is to flash an LED. hello.pru0.c
is some code that blinks the USR3 LED ten times using the PRU.
  1
2
3
4
5
6
7
8
9
10
11
12
13
14
15
16
17
18
19
20
21
22
23
24
25
26
27
28
29
30
31
32
33
34
35

  #include <stdint.h>
#include <pru_cfg.h>
#include "resource_table_empty.h"
#include "prugpio.h"

volatile register unsigned int R30;
volatile register unsigned int R31;

void main(void) {
    int i;

    uint32_t gpio1 = (uint32_t *)GPIO1;

    / Clear SYSCFG[STANDBY_INIT] to enable OCP master port */
    CT_CFG.SYSCFG_bit.STANDBY_INIT = 0;

    for(i=0; i<10; i++) {
        gpio1[GPIO_SETDATAOUT]   = USR3;    // The the USR3 LED on

        delay_cycles(500000000/5);        // Wait 1/2 second

        gpio1[GPIO_CLEARDATAOUT] = USR3;

        delay_cycles(500000000/5);

    }
    __halt();
}

// Turns off triggers
#pragma DATA_SECTION(init_pins, ".init_pins")
#pragma RETAIN(init_pins)
const char init_pins[] =
    "/sys/class/leds/beaglebone:green:usr3/trigger\0none\0" \
    "\0\0";
Later chapters will go into details of how this code works, but if you want to run it right now do the following.
bone$ git clone https://github.com/MarkAYoder/PRUCookbook.git
bone$ cd PRUCookbook/docs/02start/code|
Tip
|
If the following doesn’t work see Compiling with clpru and lnkpru for instillation instructions. |
bone$ make TARGET=hello.pru0
/var/lib/cloud9/common/Makefile:28: MODEL=TI_AM335x_BeagleBone_Black,TARGET=hello.pru0,COMMON=/var/lib/cloud9/common
/var/lib/cloud9/common/Makefile:147: GEN_DIR=/tmp/cloud9-examples,CHIP=am335x,PROC=pru,PRUN=0,PRU_DIR=/sys/class/remoteproc/remoteproc1,EXE=.out
-    Stopping PRU 0
-   copying firmware file /tmp/cloud9-examples/hello.pru0.out to /lib/firmware/am335x-pru0-fw
write_init_pins.sh
writing "none" to "/sys/class/leds/beaglebone:green:usr3/trigger"
-    Starting PRU 0
MODEL   = TI_AM335x_BeagleBone_Black
PROC    = pru
PRUN    = 0
PRU_DIR = /sys/class/remoteproc/remoteproc1bone$ make TARGET=hello.pru1_1
/var/lib/cloud9/common/Makefile:28: MODEL=BeagleBoard.org_BeagleBone_AI,TARGET=hello.pru1_1
- Stopping PRU 1_1
CC hello.pru1_1.c
"/var/lib/cloud9/common/prugpio.h", line 4: warning #1181-D: #warning directive: "Found AI"
LD /tmp/cloud9-examples/hello.pru1_1.o
- copying firmware file /tmp/cloud9-examples/hello.pru1_1.out to /lib/firmware/am57xx-pru1_1-fw
write_init_pins.sh
writing "none" to "/sys/class/leds/beaglebone:green:usr3/trigger"
- Starting PRU 1_1
MODEL = BeagleBoard.org_BeagleBone_AI
PROC = pru
PRUN = 1_1
PRU_DIR = /dev/remoteproc/pruss1-core1
rm /tmp/cloud9-examples/hello.pru1_1.oLook quickly and you will see the USR3 LED blinking.
Later sections give more details on how all this works.